
Split Video by Scene Changes in a Browser
Learn how browser-based shot detection finds hard cuts, filters flashes, and exports separate MP4 scenes locally without uploading your video.
Splitting a video at known timestamps is straightforward. Finding those timestamps automatically is the harder problem: a tool has to decide whether a large visual change is a real shot boundary, a camera flash, fast motion, or simply a new frame inside the same scene.
The ArtPlayer Scene Splitter detects likely hard cuts, turns the detected ranges into separate MP4 clips, and lets you download one scene or every scene in a ZIP archive. Analysis, export, preview, and packaging all happen locally in the browser, so the selected video does not need to be uploaded to a processing server.
This guide explains how to use it, how its shot-detection method works, and where automatic scene splitting needs human review.
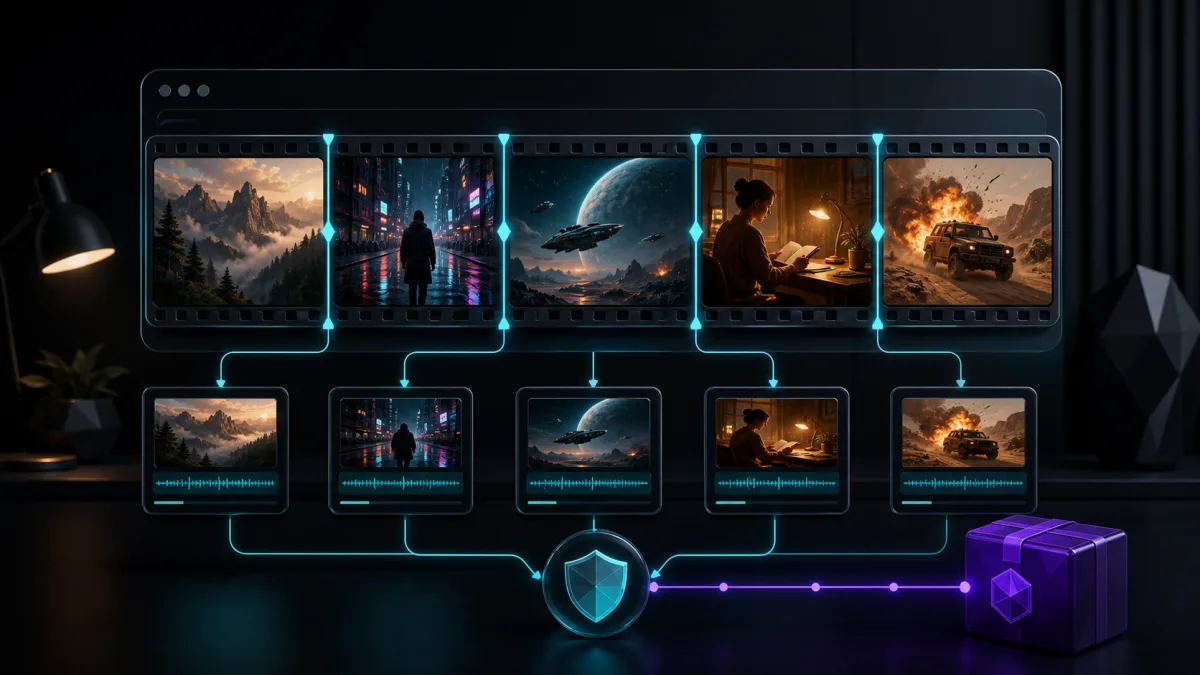
How to split a video by scene changes
The basic workflow is:
- Open the Scene Splitter in a current desktop browser.
- Choose a local video file or load the sample.
- Select Low, Standard, or High detection sensitivity.
- Choose Detect scenes and keep the tab open during analysis.
- Review the detected clips and their thumbnails.
- Preview and download an individual scene, or save all scenes as a ZIP.
Start with Standard sensitivity. It is a better baseline than immediately using High, because detecting more visual changes is not the same as finding more correct cuts.
If a video has only one continuous shot, the correct result may be one scene. The tool reuses the original file for that full-length result instead of performing an unnecessary export.
What is a scene change?
In editing terminology, this tool is primarily looking for a shot boundary: the point where one continuous camera shot ends and another begins. A direct cut from an indoor close-up to an outdoor wide shot is a strong example.
Not every visible change is a boundary. These events can alter much of a frame without starting a new shot:
- a flash or strobe;
- a fast camera pan;
- a large object moving close to the camera;
- a screen filling with smoke, water, or particles; and
- a sudden exposure or lighting adjustment.
Gradual transitions are a different challenge. A fade, dissolve, or wipe spreads the change across multiple frames, so it may not create one strong local peak. The current Scene Splitter is designed mainly for hard cuts and should not be presented as a frame-perfect detector for every transition type.
How browser scene detection works
Uploading every frame to a remote vision service would add transfer time and a different privacy boundary. Instead, ArtPlayer performs a lightweight visual analysis on the device.
The process has four main stages.
1. Sample small frames
The browser seeks through the selected video and draws sampled frames to a small 160 × 90 canvas. Analyzing this reduced frame is much less expensive than comparing every source pixel at full resolution.
Sampling frequency changes with duration:
- videos up to 2 minutes use an interval of about 0.35 seconds;
- videos from 2 to 10 minutes use about 0.5 seconds; and
- longer supported videos use about 0.75 seconds.
This is a deliberate tradeoff. Denser sampling can locate changes more closely but requires more seeks and frame comparisons. Wider intervals keep longer videos practical inside a browser tab.
2. Measure visual difference
For each pair of sampled frames, the detector converts selected pixels to luminance and combines two signals:
- the average pixel-level brightness difference; and
- the difference between 16-bin luminance histograms.
Pixel differences respond to local changes, while a histogram provides a coarser description of how the brightness distribution changed across the frame. Combining them is more useful than trusting either signal alone, but it is still visual difference detection rather than semantic understanding. The detector does not know that a frame contains the same person, location, or story event.
3. Select likely cut points
A large difference is not automatically accepted. The detector looks for a local peak that exceeds the selected sensitivity threshold and keeps likely cuts at least one second apart.
It also checks for an isolated flash pattern: two adjacent comparisons can both look very different even though the frames immediately before and after the flash remain similar. That pattern is skipped to reduce false cuts caused by brief flashes.
4. Refine and export the ranges
After coarse candidates are found, the browser refines their timing and builds half-open scene ranges from the start of the video to its end. The resulting ranges are exported locally as MP4 files, then displayed as independent preview cards.
The exported range is the result that matters. Always play several seconds on both sides of a boundary; a plausible thumbnail does not prove that the cut is accurate enough for the intended edit.
Which sensitivity should you choose?
Sensitivity changes the minimum difference required to consider a sample a cut candidate.
Low
Low requires the strongest visual change. Use it when rapid motion, lighting effects, gameplay, or screen animation creates too many false cuts. It can miss subtle real boundaries.
Standard
Standard is the recommended starting point for ordinary edited footage with clear hard cuts. Review the result before changing the setting.
High
High accepts smaller visual changes. Use it when Standard misses genuine cuts between visually similar shots. Expect to remove more false positives when the video contains movement, zooms, or changing illumination.
A useful test is to choose a one-minute section whose real cuts you can count manually. Run all three settings on that same source, then compare detected boundaries rather than choosing the setting that returns the most clips.
Why a detector can miss or invent a cut
Automatic shot detection has two main error types.
A missed cut happens when two adjacent shots look visually similar or when a gradual transition does not create a sharp enough difference. Raising sensitivity may help, but it can also introduce false cuts elsewhere.
A false cut happens when a large change occurs inside one continuous shot. Flashes, fast pans, full-screen overlays, and sudden lighting changes are common causes. Lower sensitivity may help. The flash filter handles one specific pattern, not every possible lighting effect.
If one boundary needs exact manual placement, use the Split Video or Trim Video tool after identifying the approximate scene. Automatic detection is best used to reduce repetitive work, with a person reviewing the final boundaries.
Privacy and local processing
Selecting a video gives the page permission to read that file in the current browser session. ArtPlayer uses the local video element, canvas, browser media codecs, and in-memory object URLs to analyze and export the clips.
The source video is not sent to an ArtPlayer processing API. Normal website assets and privacy-safe aggregate telemetry may still use the network, but the media content selected for scene detection remains on the device.
Local processing also means the device carries the workload. Browser codec support, available memory, video duration, and the number of exported scenes can all affect whether the job completes reliably.
Current limits and compatibility
The Scene Splitter currently accepts videos up to 30 minutes and returns at most 60 scenes. Those limits keep seeking, thumbnails, encoded clips, and ZIP creation within a bounded browser workload.
A familiar extension does not guarantee compatibility. An MP4 is a container, and the video codec inside it still has to be decodable by the browser. Export also depends on the codecs and dimensions the browser can encode.
For the most predictable test:
- Use a current desktop browser.
- Start with a short conventional MP4.
- Close other media-heavy tabs before processing a large file.
- Preview the beginning and end of several exported scenes.
- Download a scene and confirm that it opens outside the browser.
- Check the ZIP when downloading all scenes, not only the on-page previews.
Chrome, Edge, Safari, and Firefox can expose different codec and media-seeking behavior. A successful run in one browser does not prove the same input will work in every other browser.
How to evaluate detection quality
For a repeatable evaluation, prepare a short video with known boundaries and record four values:
- the number of real hard cuts;
- correctly detected cuts;
- missed cuts; and
- false cuts.
Also note the sensitivity, browser, operating system, source codec, resolution, and frame rate. Test flashes and gradual transitions separately instead of mixing every failure mode into one accuracy claim.
Do not publish a universal accuracy percentage from one sample. Detection quality depends heavily on the footage. A transparent report showing which cuts were found, missed, or falsely added is more useful than a single score.
When automatic scene splitting is useful
Scene detection works especially well as a first pass for footage with clear hard cuts, including edited tutorials, interviews with camera switches, compilations, trailers, and presentation recordings that move between distinct visual sections.
It is less suitable when every boundary must already be frame-perfect, when a video relies mainly on dissolves and fades, or when continuous motion regularly changes the entire frame.
Use the ArtPlayer Scene Splitter to find and export the obvious shot ranges, review every result, and finish any precision adjustments with a manual splitting tool. The goal is not to remove editorial judgment; it is to make the first pass faster without uploading the source video.