
Upscale Video Online Without Uploading
Learn how to upscale a video privately in your browser, choose the right quality mode, and handle WebGPU, codec, memory, and output-size limits.
Most online video upscalers send your file to a remote server. That can be convenient, but it also means waiting for an upload, trusting another service with the file, and downloading the result when processing finishes.
Modern browsers provide another option. With GPU APIs, video codecs, workers, and locally loaded model weights, a video can be decoded, enhanced, encoded, and downloaded on the same device. The ArtPlayer AI Video Upscaler follows that approach: the selected video stays in the browser and is not uploaded to an ArtPlayer server.
This guide explains how to use it, what its three quality modes do, and why browser-based video upscaling sometimes needs to reduce quality or output size.
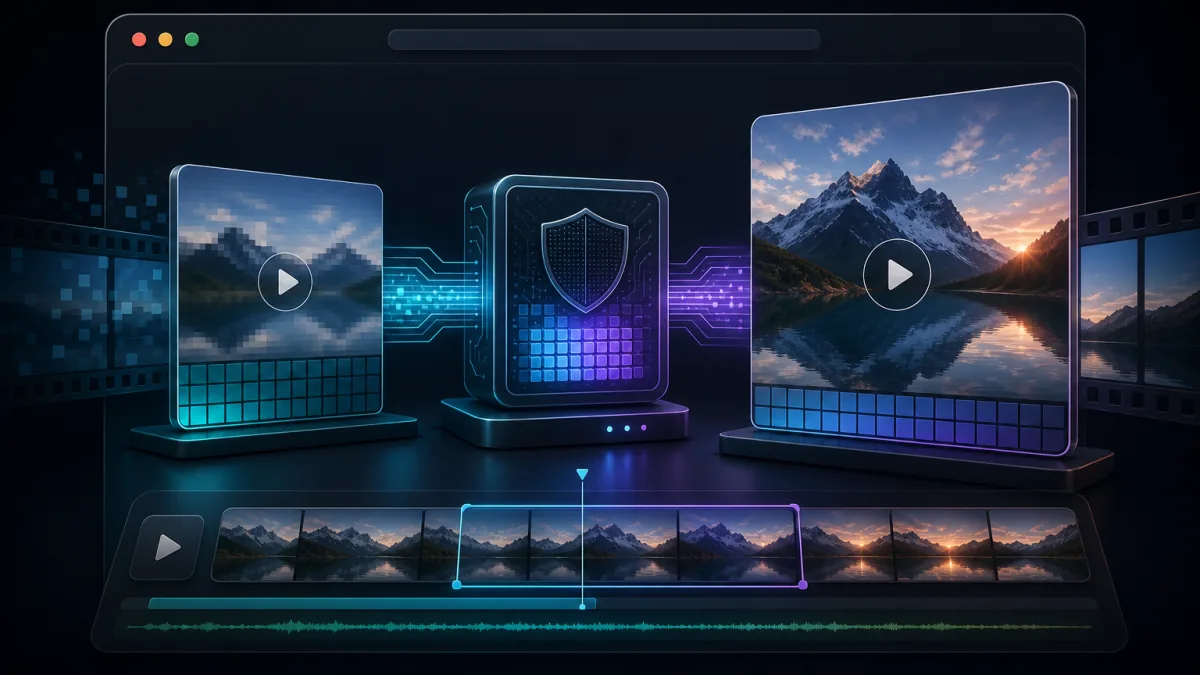
How to upscale a video in your browser
The basic workflow is short:
- Open the AI Video Upscaler in a current desktop browser.
- Choose a video file or load the sample clip.
- Select Fast, Balanced, or Quality.
- Start the upscaling process and keep the tab open while it runs.
- Compare the original and enhanced previews.
- Download the resulting MP4.
Start with a short clip if you are testing the tool for the first time. Video upscaling processes every decoded frame, so duration, frame size, frame rate, and the selected model all affect processing time and memory use.
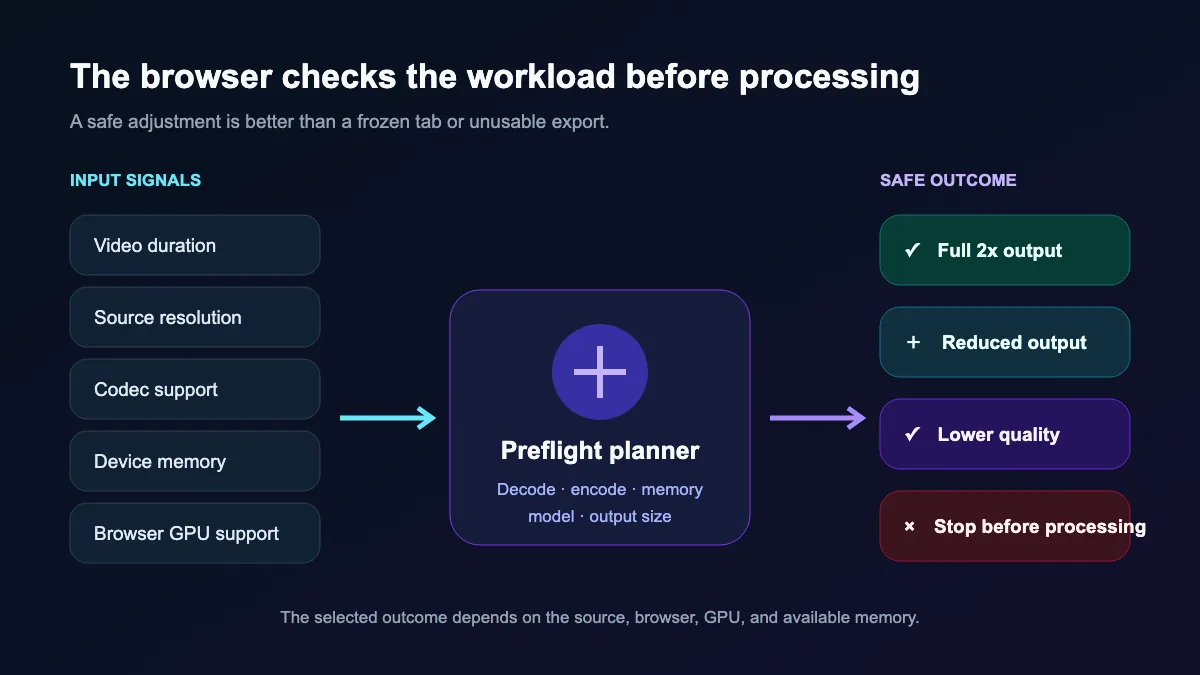
The tool inspects the video before processing begins. It checks whether the browser can decode the input, whether it can encode the planned MP4 output, and whether the estimated model and output buffers fit within a bounded memory budget. These checks are designed to stop an unsuitable workload before it causes a frozen tab or a failed export.
What happens to the video file?
Selecting a file gives the page permission to read that file inside the current browser session. ArtPlayer uses browser media APIs to inspect and decode the video, then sends frames to a dedicated browser worker for enhancement. Model weights are downloaded as static assets, but the selected video itself does not need to be sent to a processing API.
After the frames have been enhanced, the browser encodes them and creates a new MP4 in memory. The download button saves that result to your device. Temporary object URLs and processing resources are released when the result is replaced, the tool is reset, or the page is closed.
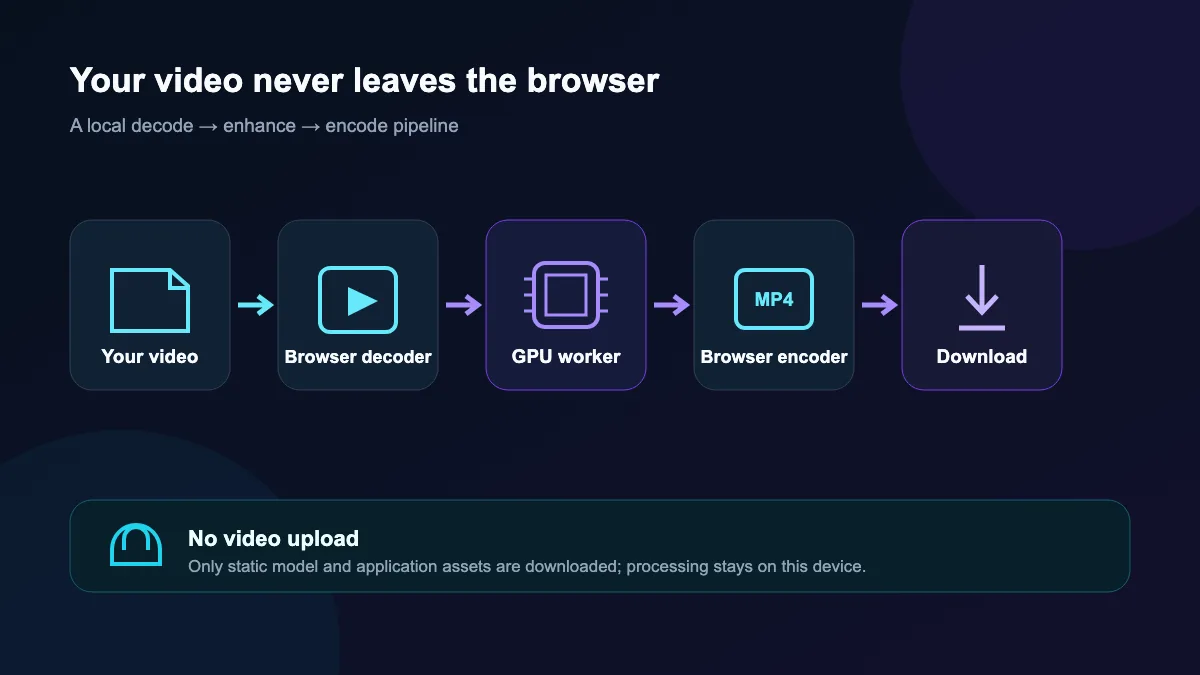
Local processing improves privacy, but it moves the compute and memory cost to your device. A powerful desktop GPU can process workloads that may be too large for a phone, an older laptop, or a browser with limited codec support.
Fast, Balanced, or Quality?
All three modes target a larger, enhanced output, but they use different model and GPU paths.
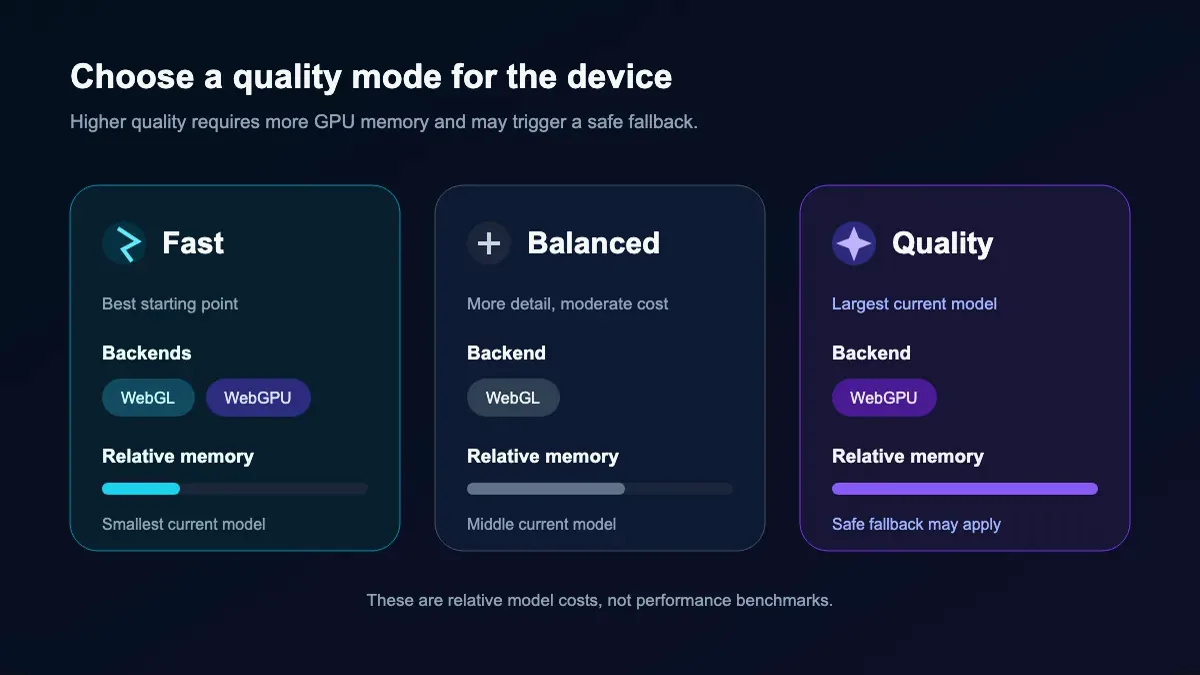
Fast
Fast uses the smallest model and has the lowest estimated memory cost. It can run through the supported WebGL or WebGPU path and is the best first choice for longer clips, lower-memory devices, or a quick compatibility test.
Use Fast when completing the job reliably matters more than extracting the maximum visible improvement from every frame.
Balanced
Balanced uses a larger model through the WebGL renderer. It is intended as the middle ground between processing cost and enhancement strength.
Use Balanced on a modern desktop when Fast works correctly and you want to compare a stronger result without requiring the Quality mode's WebGPU path.
Quality
Quality uses the largest of the three current models and a source-owned WebGPU renderer. It needs WebGPU support and has the highest estimated GPU memory cost.
If WebGPU is unavailable or the workload exceeds the bounded memory policy, the tool may fall back to Balanced or Fast and display a warning. This is an intentional reliability measure, not a promise that every device can run the largest model.
For an unfamiliar device, begin with Fast, confirm that the preview and MP4 export work, and then compare the other modes with the same short source clip.
What does 2x video upscaling mean?
A 2x spatial scale normally means doubling both width and height. A 640 × 360 source would therefore target 1280 × 720, while 1280 × 720 would target 2560 × 1440. Doubling both dimensions produces four times as many output pixels per frame.
The browser may select a smaller scale when the full 2x dimensions cannot be encoded reliably on the current device. The available planning steps include 2x, 1.75x, 1.5x, 1.25x, and the original frame size. When this happens, the result remains an enhanced export, but the interface reports that the output resolution was reduced.
Upscaling can make edges look cleaner and improve the presentation of low-resolution animation, screen recordings, and compressed footage. It cannot recover an exact face, texture, or written character that was never captured in the source. Treat the result as a model-assisted reconstruction, not as proof of missing real-world detail.
Why video upscaling uses so much memory
Browser video upscaling combines several demanding operations:
- decoding the source video;
- transferring and processing frames in a worker;
- running a GPU model at the output resolution;
- encoding the enhanced frames;
- preserving audio when the browser can process it; and
- building the downloadable MP4 in memory.
Resolution has a particularly large effect. A full 2x output contains four times the source pixel count, and a larger model needs additional intermediate GPU buffers. Duration also matters because the completed MP4 is assembled in memory before download.
ArtPlayer estimates both the model workload and the likely output size before processing. On constrained devices it can reduce the model level, cap the planned output resolution, or reject a workload that is unlikely to complete.
If you encounter a resource-limit message, try these changes in order:
- Trim the source to the section you actually need.
- Choose Fast instead of Quality or Balanced.
- Start with a lower-resolution source.
- Close other GPU-heavy tabs and applications.
- Use a current desktop version of Chrome or Edge.
Reducing a clip's duration is often more useful than repeatedly retrying the same workload because it also reduces the in-memory output size.
Codec and container compatibility
A filename such as .mp4 identifies a container, not the exact video codec
inside it. Two MP4 files can behave differently when one contains a video track
the browser can decode and the other does not.
The upscaler checks the primary video track with browser decoding capabilities before starting the model. It separately checks whether the browser can encode an AVC MP4 at the planned output dimensions. A file can therefore be playable in a desktop application but still be unsuitable for a browser-based export.
For the most predictable workflow, use a conventional MP4 with a video codec supported by your browser. If inspection or decoding fails, convert the source to a browser-friendly MP4 first, then retry with a short segment. If encoding fails only at a large output size, allow the tool to choose a smaller output or start from a lower-resolution source.
WebGPU and WebGL are not the same thing
WebGL is widely available and provides the rendering path used by the Fast and Balanced profiles. WebGPU is a newer GPU API with a compute model better suited to the largest current Quality profile, but availability still depends on the browser, operating system, GPU, and driver.
Seeing a WebGPU option in a browser does not guarantee that every video and model will fit in GPU memory. ArtPlayer also applies its own bounded workload policy so that a technically available backend is not treated as unlimited.
Safari and mobile browsers can have different decoding, encoding, memory, and GPU behavior from desktop Chromium. If a workflow is important, validate the complete process on the target browser: select the file, finish processing, play the result, seek through it, confirm audio, and download the MP4.
When to use a different upscaler
Choose the tool that matches the source media:
- Use the AI Video Upscaler for ordinary video files and MP4 output.
- Use the AI Image Upscaler for a single JPG, PNG, or WebP image.
- Use the GIF Upscaler when animated GIF timing and GIF output need to be preserved.
Converting a still image into a video just to upscale it adds unnecessary work, while treating an animated GIF as a single image loses its animation.
A practical way to evaluate the result
Use the same short source when comparing quality modes. Look at fine lines, text edges, animation contours, compression blocks, and motion between frames. Do not judge only from a paused frame at a different display size.
Then verify the exported file rather than relying on the preview alone:
- confirm its dimensions and duration;
- play it from beginning to end;
- seek to several positions;
- check that motion remains stable;
- listen for synchronized audio; and
- confirm that the downloaded MP4 opens in the target player.
This separates a successful model preview from a genuinely usable export.
Browser-local upscaling will not replace every desktop or server workflow, but it is a useful option for private clips, quick experiments, and devices that can support the workload. Start with a short video and the Fast profile, then use the ArtPlayer AI Video Upscaler to find the best balance for your browser and device.